Transport Box
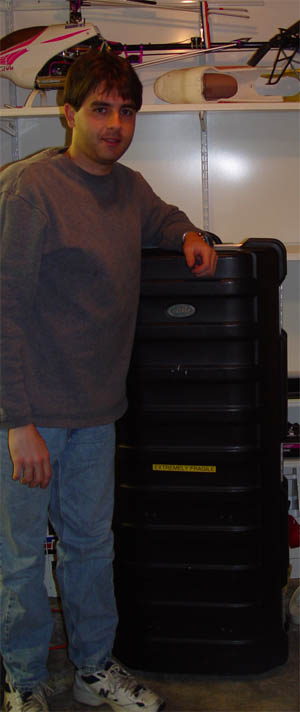
Transporting a helicopter without a car is not trivial. I made a special box
that I can carry on my back, fitting all I need for flying:
the helicopter, 2.5 liter fuel tank, hand pump, glow plug power supply,
transmitter, starter stuff and even tools (locktite, screwdrivers, spare parts).
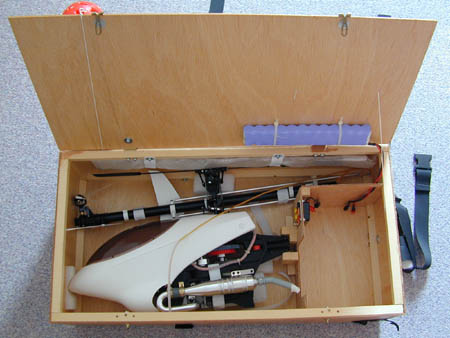
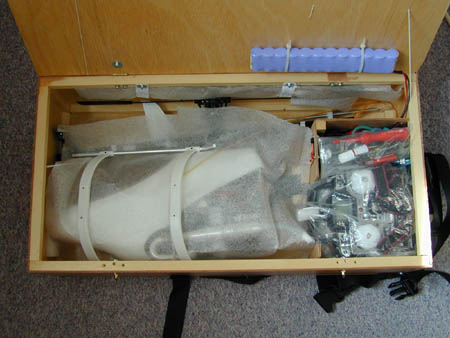
| Transport box. Tail boom has to be removed from the heli. | Everything needed fits in there! |
My case is 74x38x20 cm, which is equivalent to a large backpack.
I used very thin wood and therefore it is
very light. At the same time it is stiff enough due to the frame glued to the wood.
It fits very good, so I can walk and cycle quite long (easily half an hour) with it.
It is also very convenient to carry the heli from the parking place to the
field with this case - everything there in one walk, without much efford. And
last but not least, it takes far less storage space at home!
In may 2000 people on my club made objections against the repeated mounting and dismounting of
the tail that is required to fit the heli in the transport box. Bolts might become loose
after repeated screwing and unscrewing, and I risked a take-off embargo (is this the right
word?) if I would continue using the transport box. So be warned
if you are also using a case - for instance a commercial one from Curtis Youngblood, see below -
and plan to fly in the Netherlands!
To alleviate their objections and to increase safety,
I made a number of changes to the mounting of the tail.
First I changed the tail control rod joint for two rings that can be connected with a bolt.
Second, I changed the self-tapping screws holding the tail boom and landing gear
with bolts glued into the frame. I used nylon nuts here for a short while,
to be sure that the nuts and not the bolt will wear over time.
This is possible because these nuts don't have to hold anything
tightly, they just keep the parts on their place.
However the nylon nuts wore out very quick, and soon I switched to locknuts.
This works fine, the bolts will not wear with this.
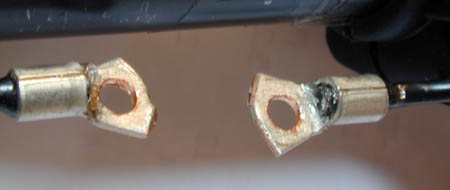
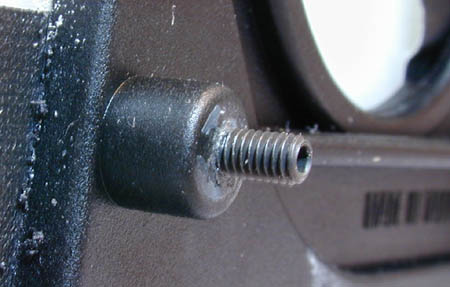
| Rings attached to the ends of the tail linkage rod. Now the rods can be connected by putting a bolt through the rings. | Bolt to hold the tail boom support. Only the plastic nut keeping the tail boom in place (not shown) will wear. Later I started using locknuts, the bolts are not wearing anyway and locknuts wear out much slower than nylon. |
The rings to connect the tail linkages showed not strong enough: after some 80 flights one of them cracked. I replaced them with stronger ones, approximately the thickness of the original. These were made from two pegs designed to hold the boards in a cupboard.
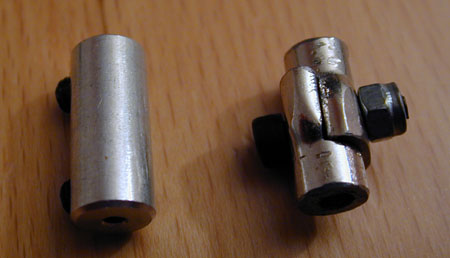
| New, stronger connection rings (right) and the original (left) |
 Later I heard that Curtis Youngblood, current two-time world champion heli flying,
also sells cases for helicopters. See
his web site for details.
This box is much larger with 46"x18"x11" (according to runboy at RR forum),
you can fit a raptor 50 even without removing the tail.
You can also fit two 60 helis if you remove the tail booms.
You will have to build up the interior yourself.
I don't think this case is suited as a backpack.
Later I heard that Curtis Youngblood, current two-time world champion heli flying,
also sells cases for helicopters. See
his web site for details.
This box is much larger with 46"x18"x11" (according to runboy at RR forum),
you can fit a raptor 50 even without removing the tail.
You can also fit two 60 helis if you remove the tail booms.
You will have to build up the interior yourself.
I don't think this case is suited as a backpack.
Another option is the
zoom's hobby heli case.
Apparently it's the same case as above, but they sell it including foam and velcro.
© W.Pasman, 24/2/3